
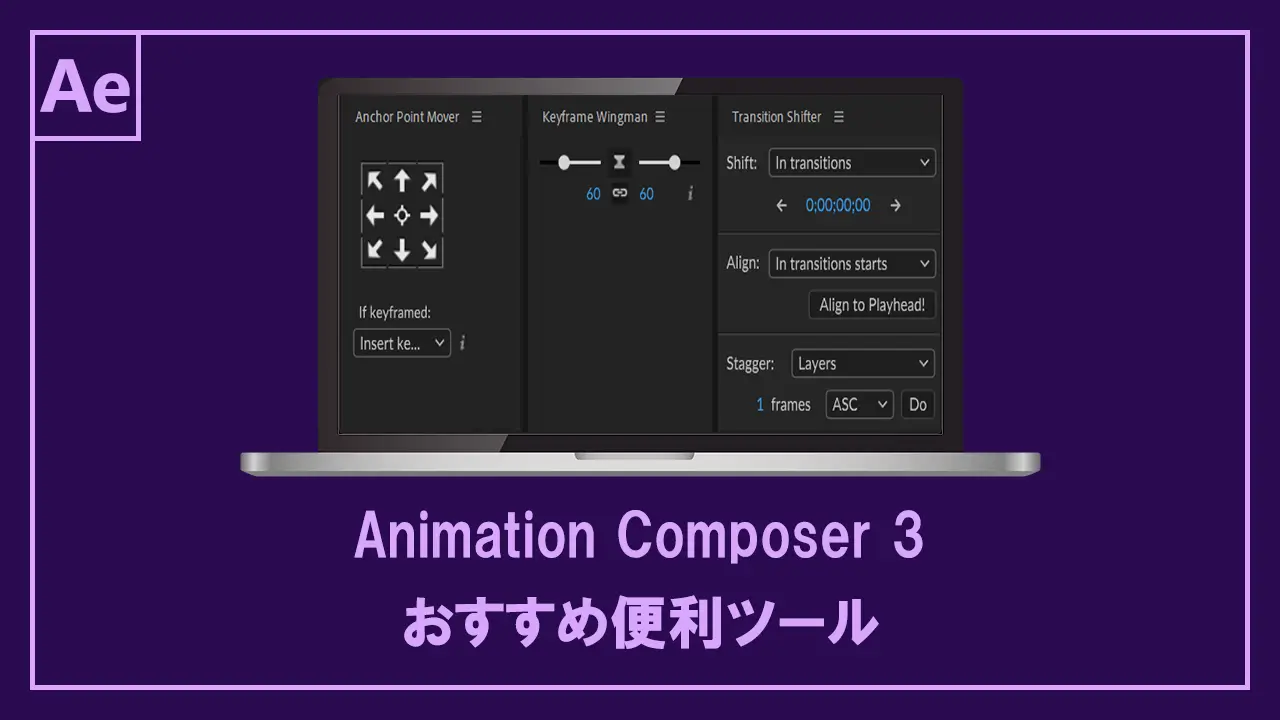
Animation Composer 3で使える3つの便利ツール – After Effectsおすすめプラグイン
どうも、YUです。
今回は、Animation Composer 3に付属でついてくる3つのツールを解説します。
- Animation Composer 3に付属している3つのツールについて知りたい
- After Effectsで作業効率を上げたい
Animation Composer 3は、テンプレートから誰でも簡単にアニメーションやモーショングラフィックが作れるプラグインです。
インストールすることで、『Anchor Point Mover』、『Keyframe Wingman』、『Transition Shifter』の3つの便利ツールが利用できます。
Animation Composer 3のダウンロード・インストールや基本的な使い方が知りたい方は、以下の記事で詳しく解説しています。
Animation Composer 3で使える便利ツール
Animation Composer 3には、『Anchor Point Mover』、『Keyframe Wingman』、『Transition Shifter』の3つの便利ツールがあります。
どれもAfter Effectsでは必須級のツールです。
有料のプラグインで同様のものはありますが、無料で使いやすいツールですので、After Effectsを始めたての初心者や高機能なツールが必要ない方はおすすめです。
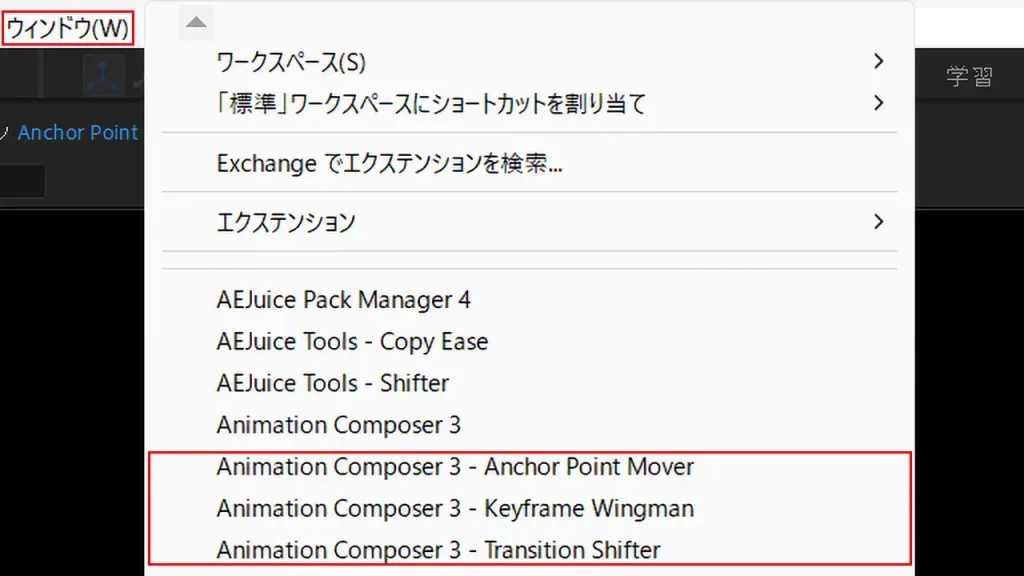
まずは、各種ツールの起動方法です。
ツールは独立のパネルになっており、ウィンドウタブから各種ツールをクリックすると起動することができます。
それでは、一つずつ詳しく解説していきます。
Anchor Point Mover
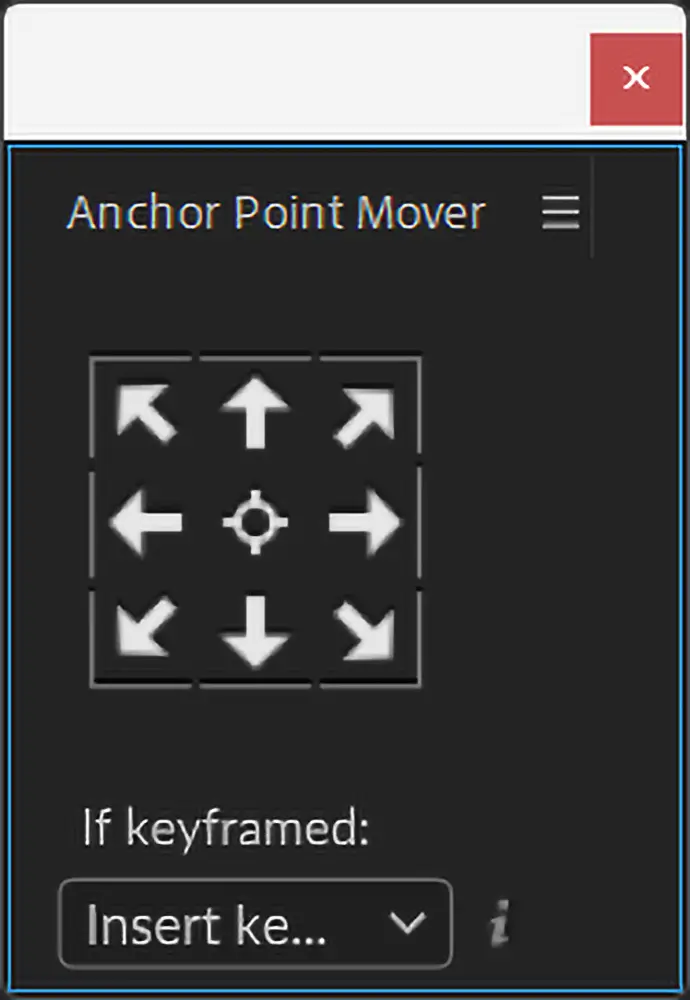
Anchor Point Moverは、レイヤーのアンカーポイントをワンクリックで移動できる便利ツールです。
![]() アンカーポイントとは、オブジェクトを動かす時の基準点です。
アンカーポイントとは、オブジェクトを動かす時の基準点です。
移動・回転・拡大縮小などの動きは、このアンカーポイントを基準に行われます。
使い方
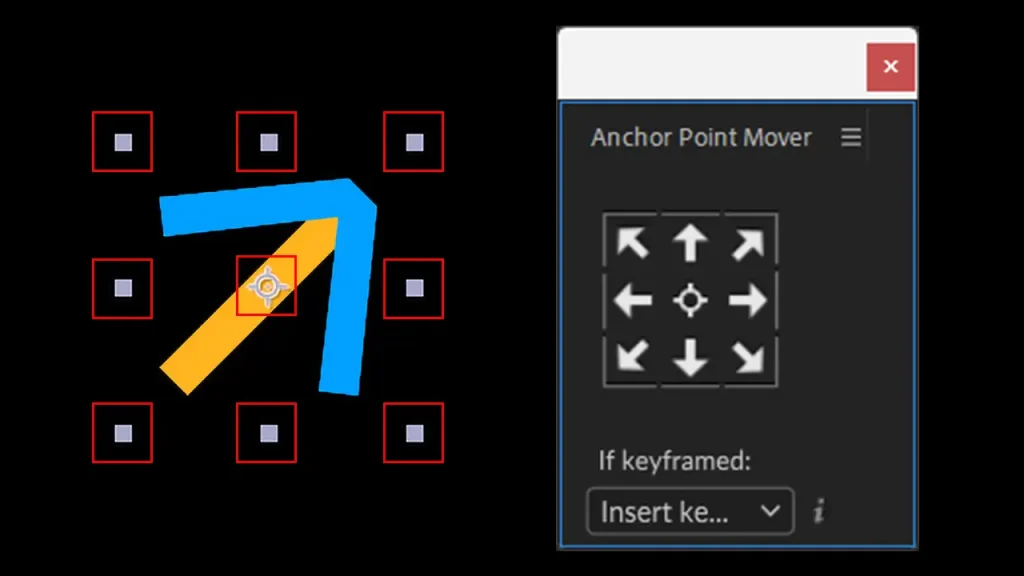
アンカーポイントを変更したいレイヤーを選択します。
Anchor Point Moverパネル内の矢印や中央をクリックすることで変更できます。
コンポジションパネルに表示されているレイヤーのアンカーポイント9箇所が変更可能です。
アンカーポイントの変更方法には2つの方法があります。
If keyframed:から『Insert keyframe to playhead』と『Modify existing keyframes』のどちらかを選択します。

| If Keyframed欄 | 詳細 |
|---|---|
| Insert keyframe to playhead | 選択したレイヤーの特定(一部)キーフレームのアンカーポイント情報を変更して移動させる。 一部のみのアンカーポイントを移動させるため、アニメーションが変わる。 |
| Modify existing keyframes | 選択したレイヤーのすべてのキーフレームのアンカーポイント情報変更して移動させる。 キーフレームにあるアンカーポイント情報をすべて変更するため、アニメーションが変わらない。 |
Insert keyframe to playheadはキーフレームがない時に選択、Modify existing keyframesはキーフレームがあるときに選択と覚えておけば大丈夫です。
Insert keyframe to playheadを選択すると、以下のようにアンカーポイントが移動します。
Modify existing keyframesを選択すると、以下のようにアンカーポイントが移動します。
Keyframe Wingman
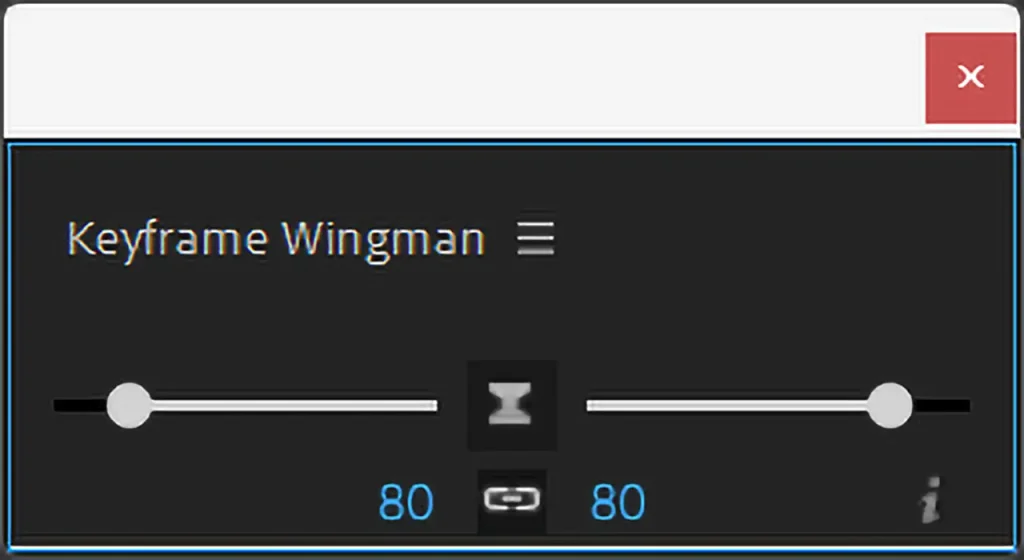
Keyframe Wingmanは、レイヤーのイージングをコントロールすることができる便利ツールです。
イージングとは、アニメーションに速度に緩急をつけることです。
通常、イージングを設定するには変更したいキーフレームを選択して、ショートカットキーF9かメニューからイージーイーズを適用します。
イージング自体はすぐに適用できますが、イージーイーズイン・アウトや速度の値など詳細な設定は別のパネルから変更することになるので手間がかかります。
Keyframe Wingmanパネルを使うことで、詳細な設定を行うことができるため作業効率が向上します。
使い方
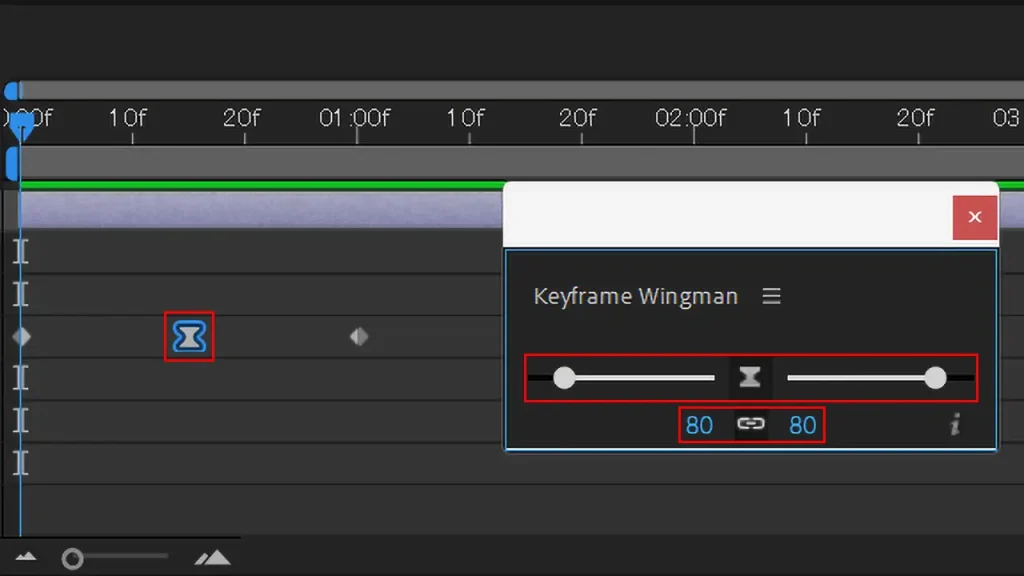
タイムラインパネルからイージングを適用したいキーフレームを選択します。
Keyframe Wingmanパネルのスライドバーを動かすか、下の数字を変更することで自動的に適用できます。
スライドバーと数字は連動しているので、どちらか一方を変えるだけです。
以下の動画ようにスライドバーを動かすことで簡単に適用できます。
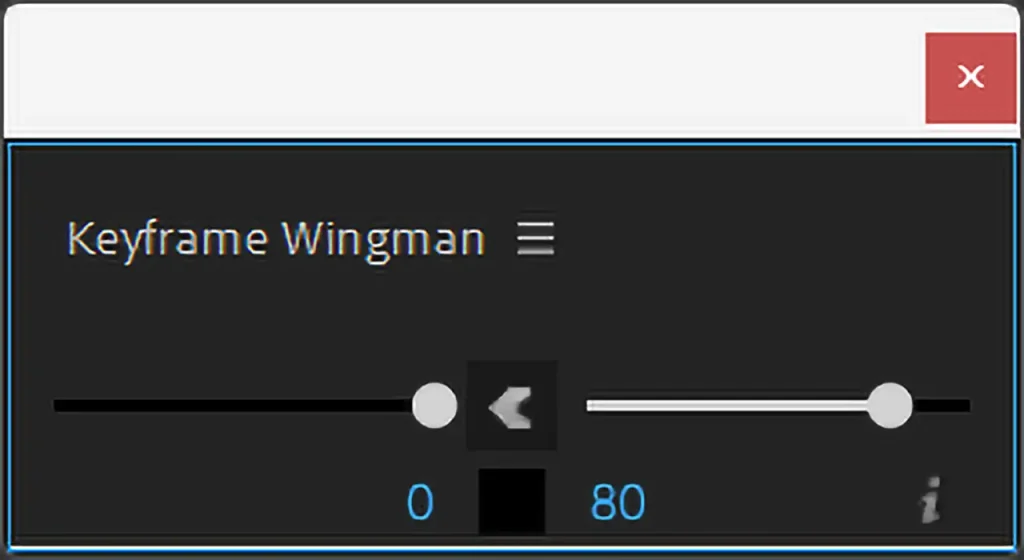
![]() 鎖マークのチェックを外して、片方のスライドバーまたは数字を変更することで、イージーイーズイン・アウトを適用することもできます。
鎖マークのチェックを外して、片方のスライドバーまたは数字を変更することで、イージーイーズイン・アウトを適用することもできます。
イージーイーズインを適用する場合は、右のスライダーを左端まで移動させるか、数字を0にします。
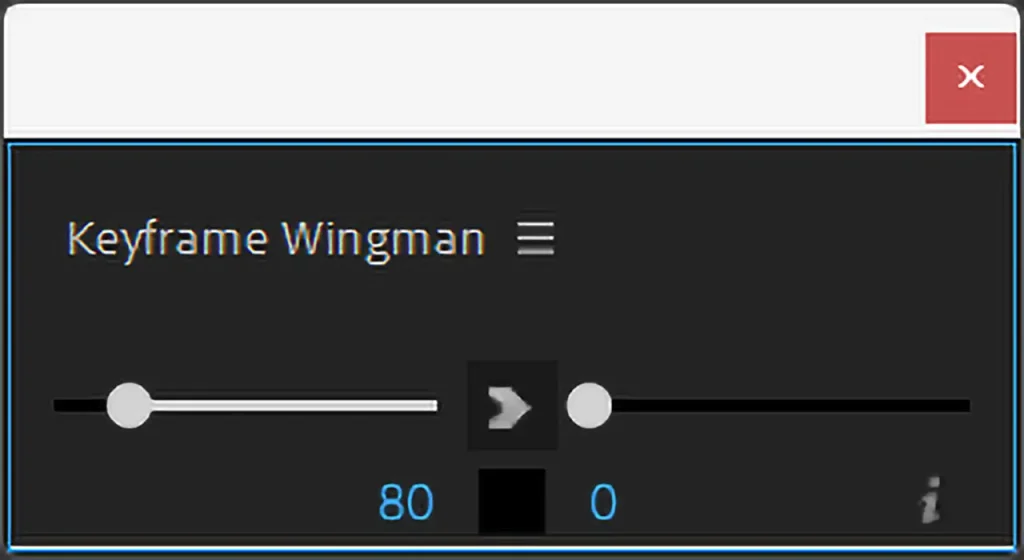
イージーイーズアウトを適用する場合は、左のスライダーを右端まで移動させるか、数字を0にします。
Transition Shifter
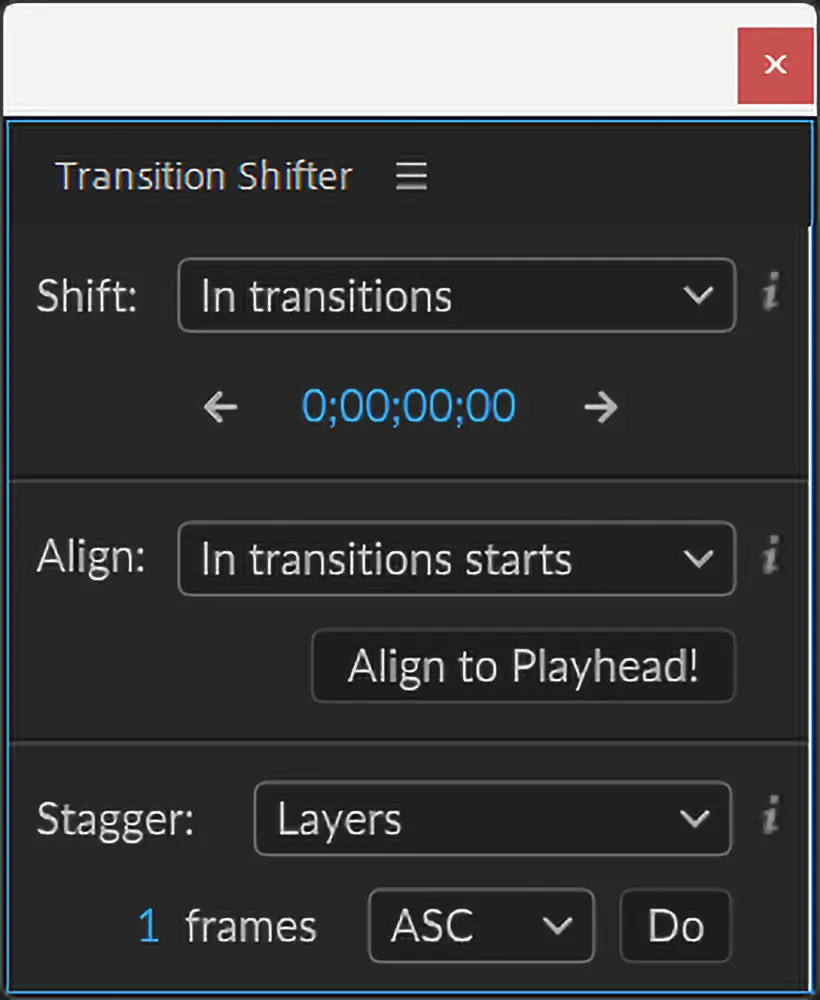
Transition Shifterは、Animation Composerで適用したプリセットのトランジションマーカーのタイミングを一括調節することができるプラグインです。
Transition Shifterには、『Shift』、『Align』、『Stager』の3つの機能があります。
Transitions Shifterを使う前に
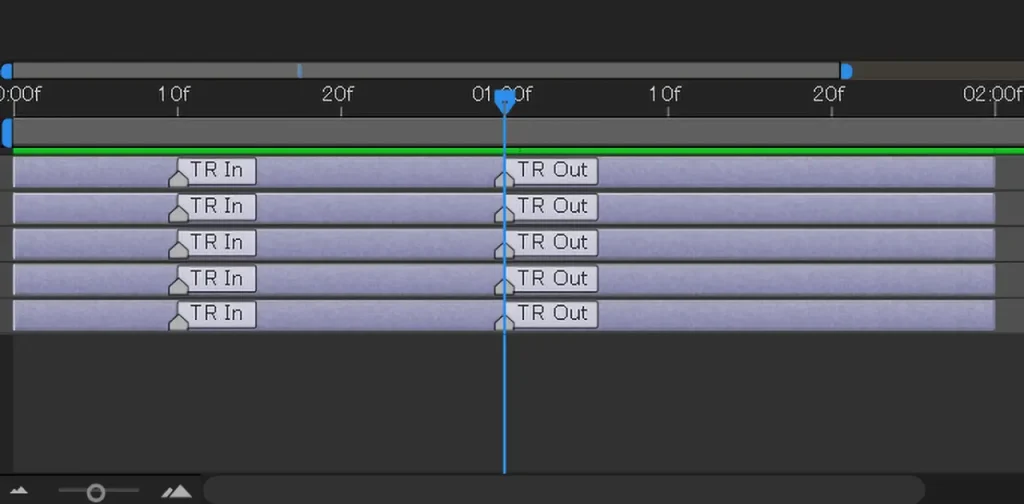
Transitions Shifterを使う前に、Animation Composer 3で適応したプリセットのトランジションについて解説します。
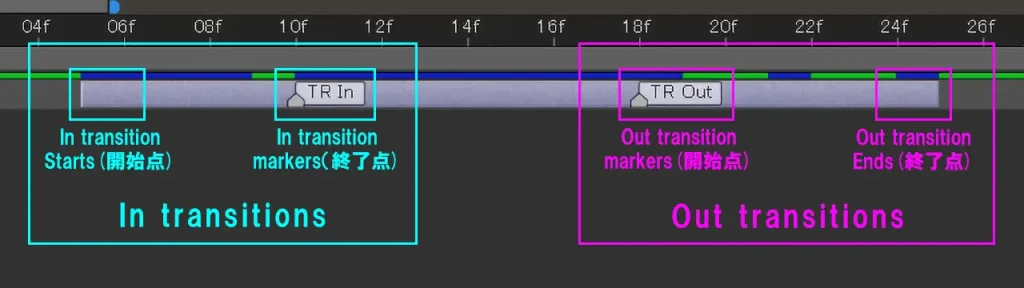
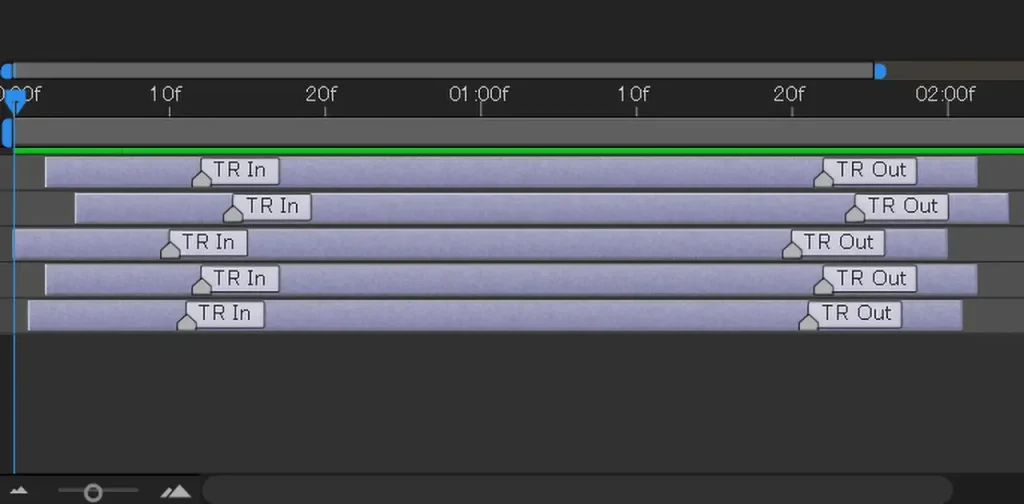
水色の枠で囲まれている『In transitions』は、出現アニメーションになります。
デュレーションバーの開始点がアニメーションの始まりで、TR Inマーカー(終了点)がアニメーションの終わりになります。
紫色の枠で囲まれている『Out transitions』は、消滅アニメーションになります。
TR Outマーカー(開始点)がアニメーションの始まりで、デュレーションバーの終了点がアニメーションの終わりになります。
Shift機能の使い方
Shiftは、指定した時間分、レイヤーをまとめて移動させる機能です。
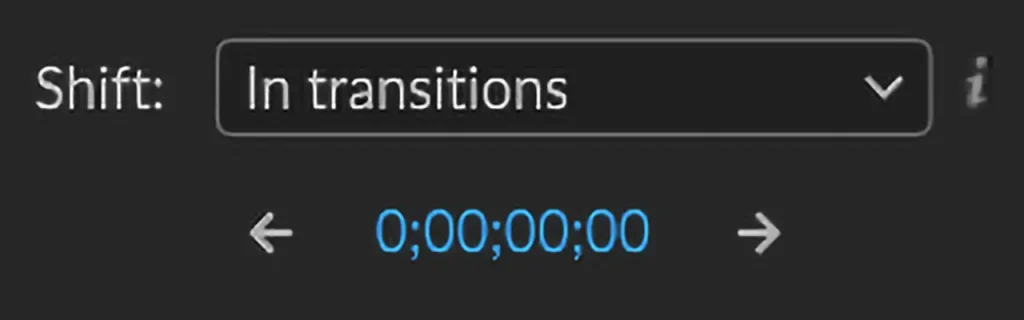
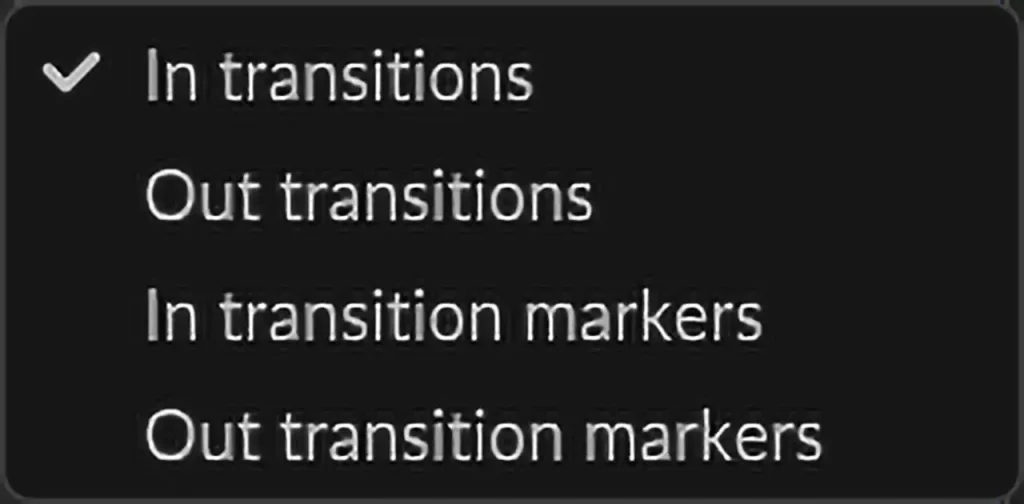
移動させる基準は『In transitions』、『Out transitions』、『In transition markers』、『Out transition markers』の4つあります。
| Shift欄 | 詳細 |
|---|---|
| In transitions | In transitionsの開始点を移動・デュレーションが変化・出現アニメーション不変 |
| Out transitions | Out transitionsの終了点を移動・デュレーションが変化・消滅アニメーションは不変 |
| In transition markers | TR Inマーカーのみ移動 |
| Out transition markers | TR Outマーカーのみ移動 |
使い方は、まず移動させたいレイヤーを選択します。
Shift欄から、移動させたい基準点を選択します。
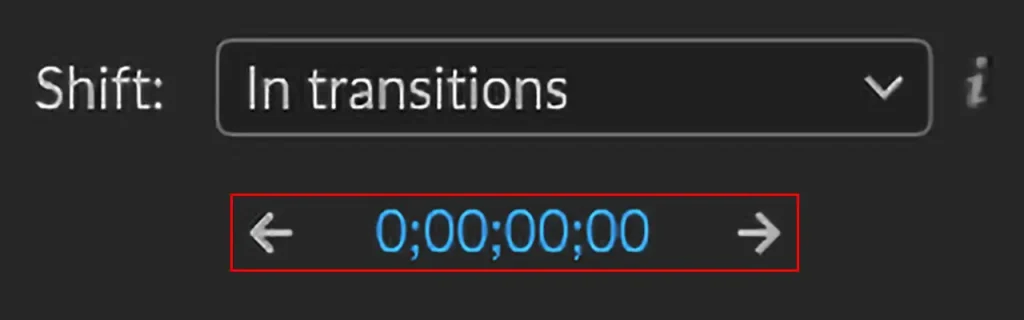
下の数字が表示されているところで調整できます。
移動させる方法は、数字を入力、数字の部分をドラッグ、矢印をクリックの3つあります。
| 移動させる方法 | (前後)5フレーム移動させる場合 |
|---|---|
| 数字を入力 | (±)0;00;00;05と入力する |
| 数字の部分をドラッグ | 左右に5フレーム分ドラッグする |
| 矢印をクリック | 左右の矢印を5回クリックする |
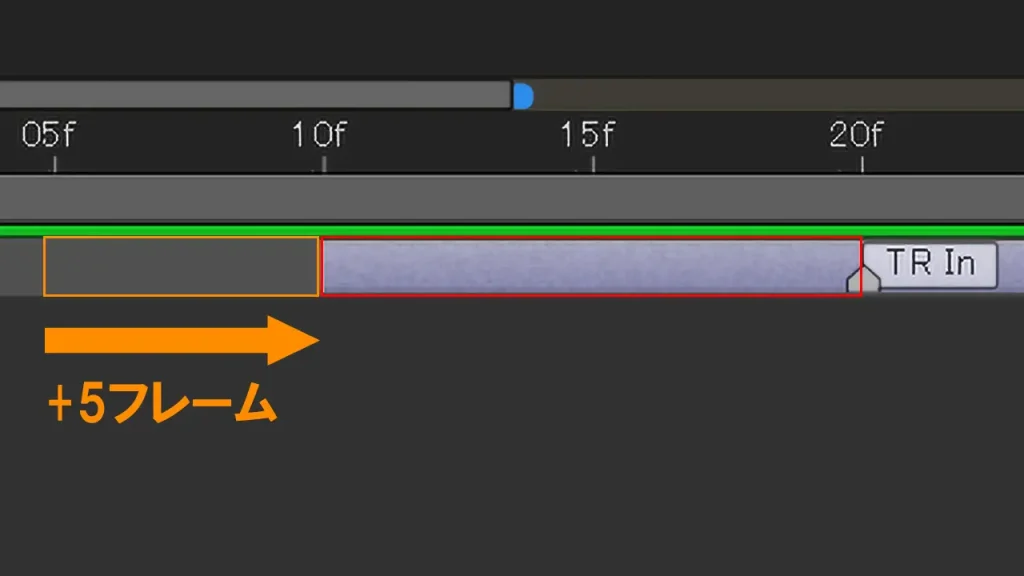
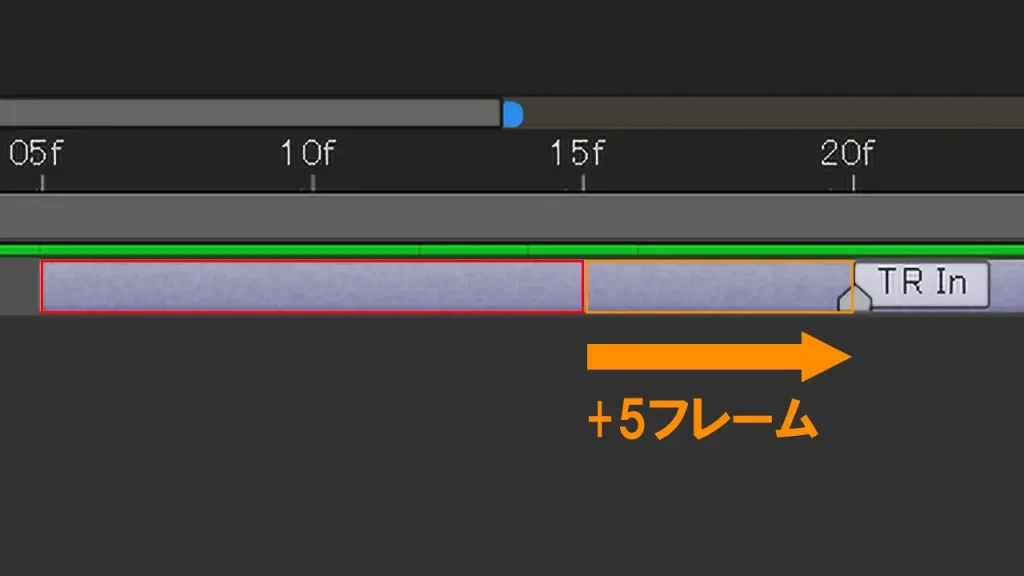
In transitionsを選択して+5フレーム移動させると、デュレーションバーの開始点が5フレーム分右にずれますが、In transitionsの長さは同じままになります。
※-5フレーム移動させた場合は、デュレーションバーの開始点が5フレーム分左にずれます。
※Out transitionsを選択した場合も、デュレーションバーの終了点が5フレーム分右にずれますが、Out transitionsの長さは同じままになります。
In transition markersを選択して+5フレーム移動させると、TR Inマーカーが5フレーム分右にずれてIn transitionsの長さが変わります。
※-5フレーム移動させた場合は、TR Inマーカーが55フレーム分左にずれます。
※Out transition markersを選択した場合も、TR Outマーカーが5フレーム分右にずれてOut transitionsの長さが変わります。
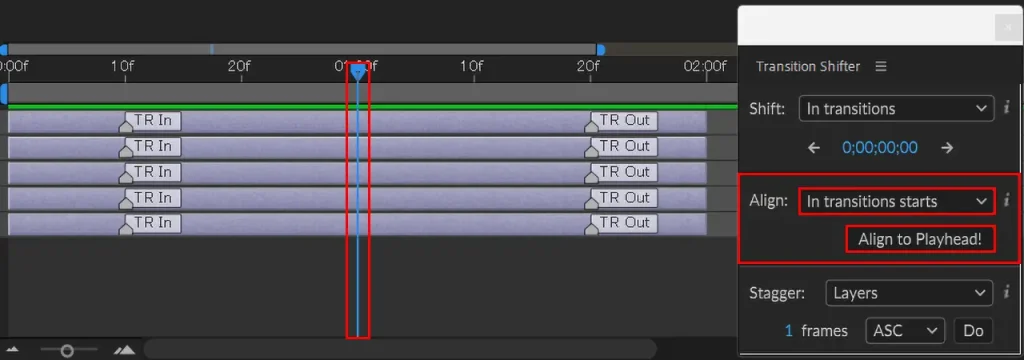
Align機能の使い方
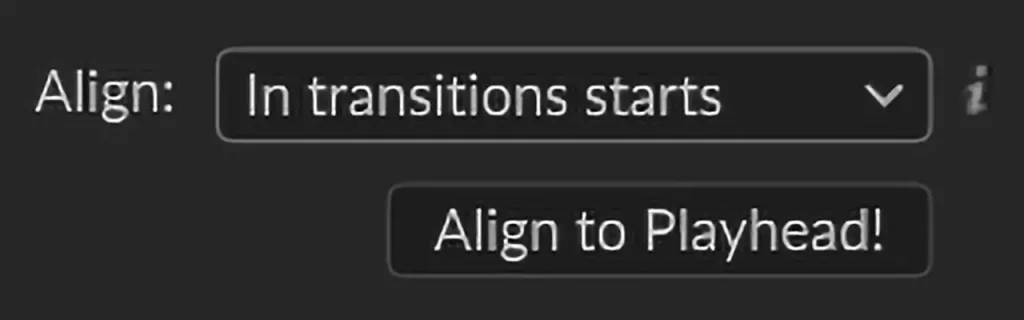
Alignは、選択したレイヤーを再生ヘッドの位置へ移動させることができる機能です。
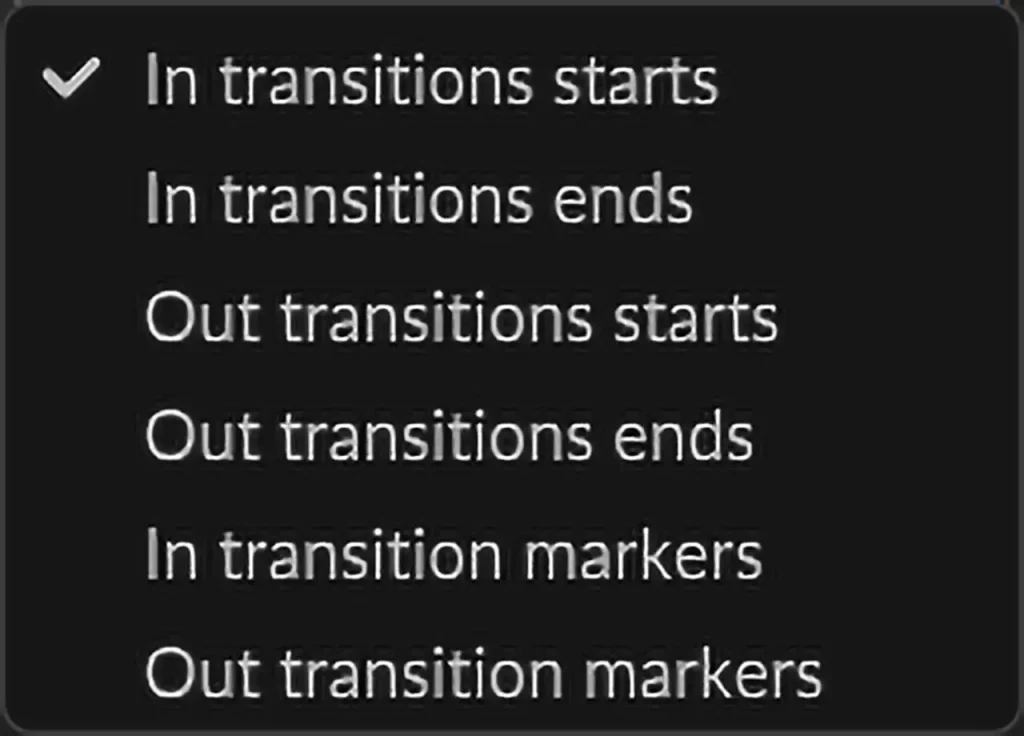
移動させる基準は『In transitions starts』、『In transitions end』、『Out transitions starts』、『Out transitions ends』、『In transition markers』、『Out transitions markers』の6つあります。
| Align欄 | 詳細 |
|---|---|
| In transitions starts | In transitionsの開始点を基準にして再生ヘッドへ移動 |
| In transitions ends | In transitionsのTR Inマーカー(終了点)を基準にして再生ヘッドへ移動 |
| Out transitions starts | Out transitionsのTR Outマーカー(開始点)を基準にして再生ヘッドへ移動 |
| Out transitions ends | Out transitionsの終了点を基準にして再生ヘッドへ移動 |
| In transition markers | In transitionsのTR Inマーカー(終了点)のみ再生ヘッドへ移動 |
| Out transition markers | Out transitionsのTR Outマーカー(開始点)のみ再生ヘッドへ移動 |
クリックすることで画像を確認できます
In transitions starts
In transitions ends

Out transitions starts
Out transitions ends
In transition markers
Out transition markers
移動させたいレイヤーを選択します。
この時、複数選択してもすべて適用されます。
Align欄から、移動させたい基準点を選択します。
Align to Playheadをクリックすると、再生ヘッドの位置に移動します。
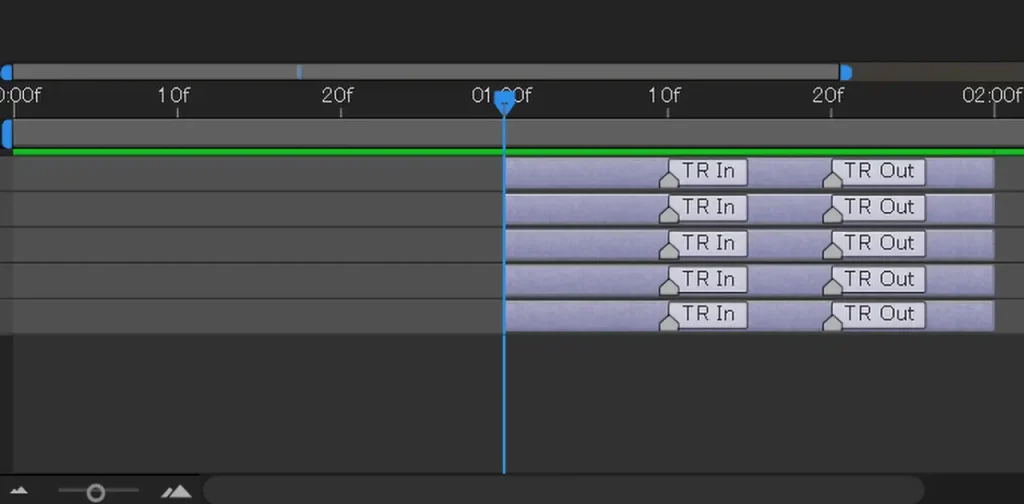
適用後は下記の画像のように移動します。
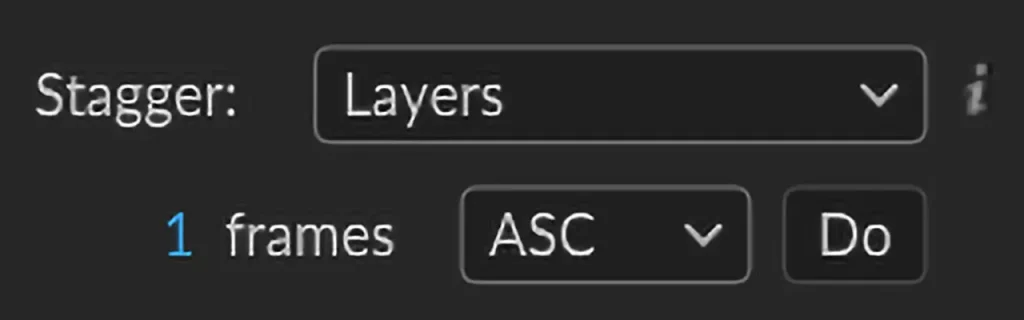
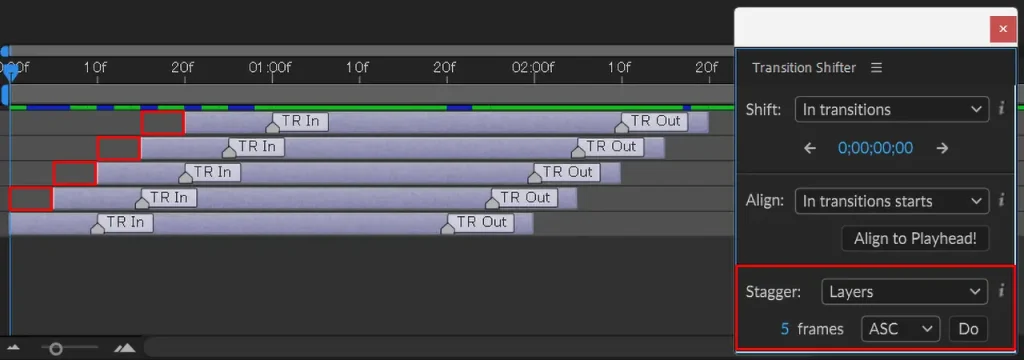
Stagger機能の使い方
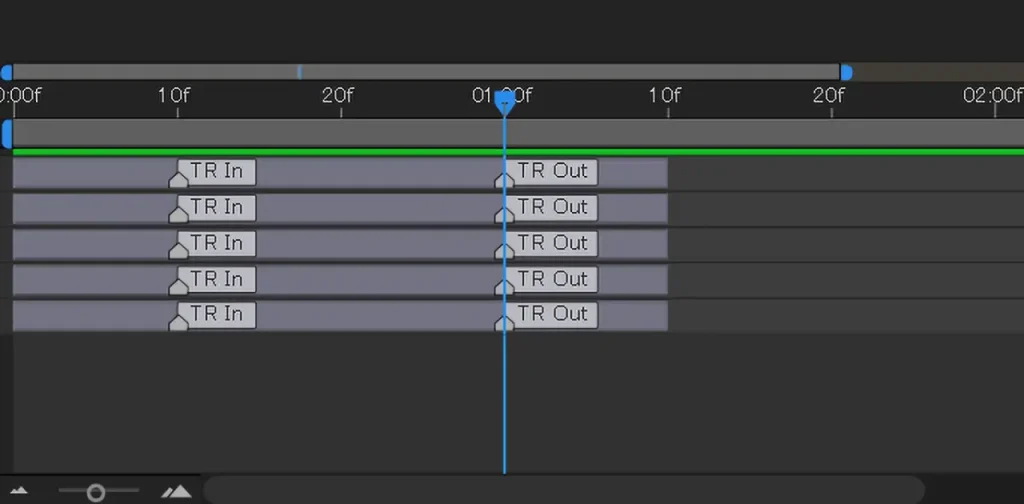
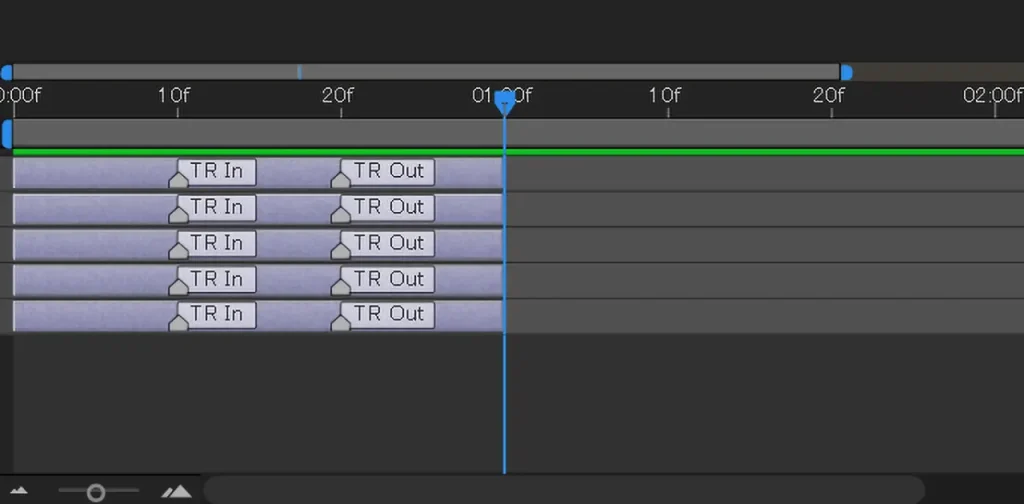
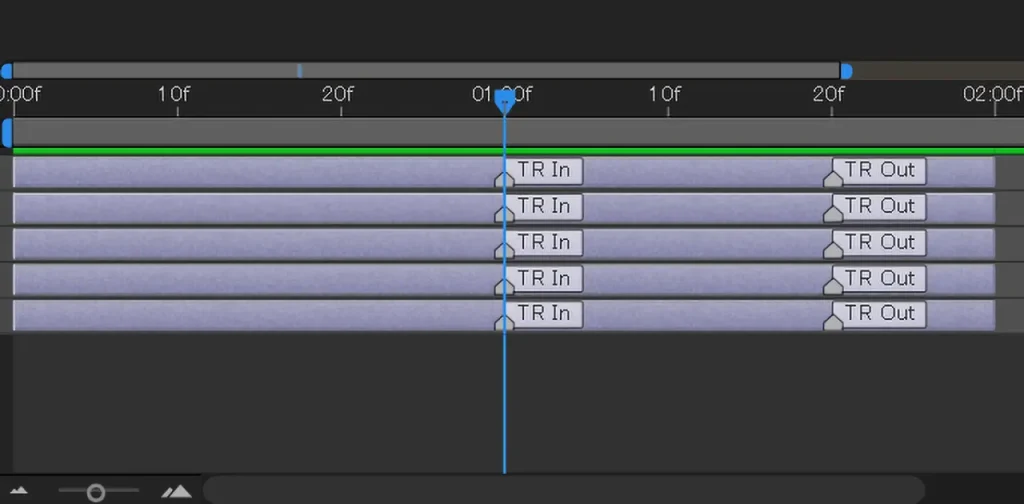
Staggerは、選択したレイヤーを指定したフレームの数値分ずらして配置もしくは均等配置する機能です。
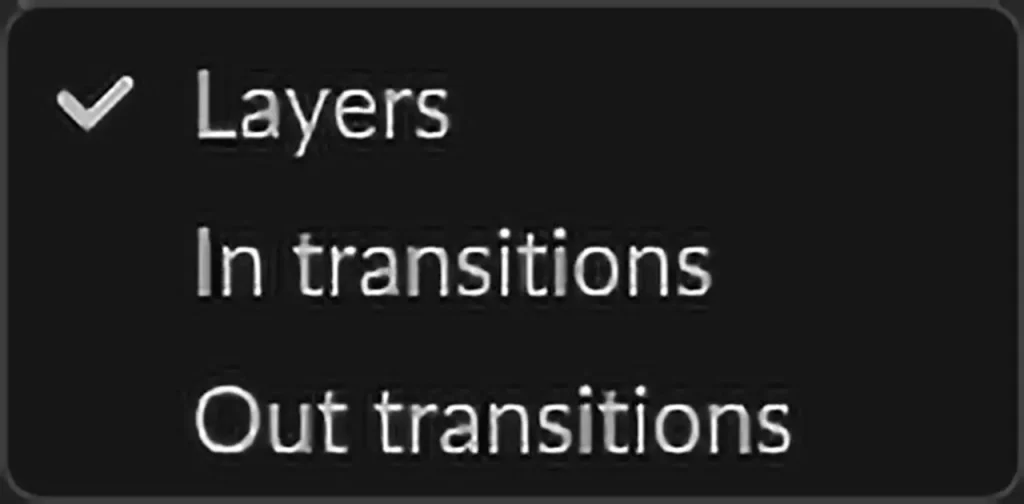
適用できるレイヤー対象は『Layers』、『In transitions』、『Out transitions』の3つになります。
| Stagger欄・対象 | 詳細 |
|---|---|
| Layers | 選択したレイヤーを移動 |
| In transitions | In transitionsの開始点を移動・デュレーションが変化 |
| Out transitions | Out transitionsの終了点を移動・デュレーションが変化 |
以下から画像で確認でます。
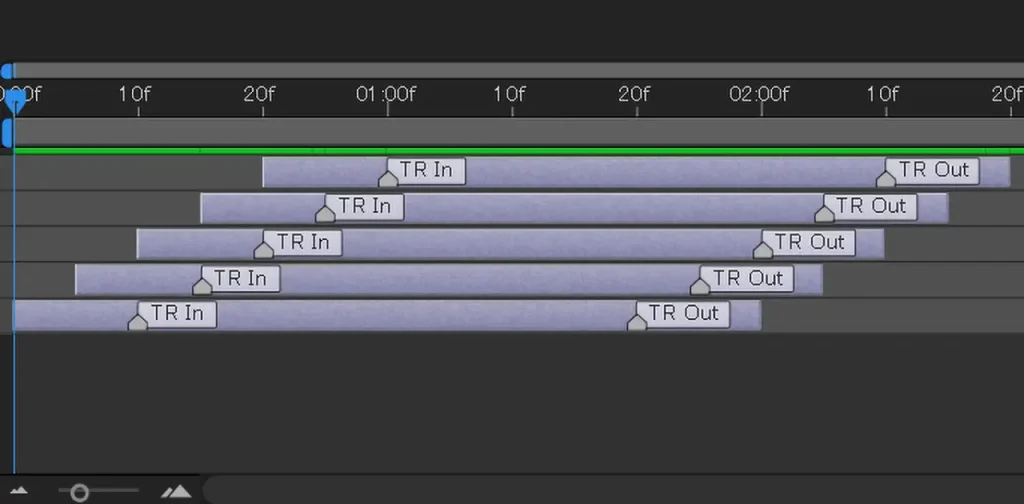
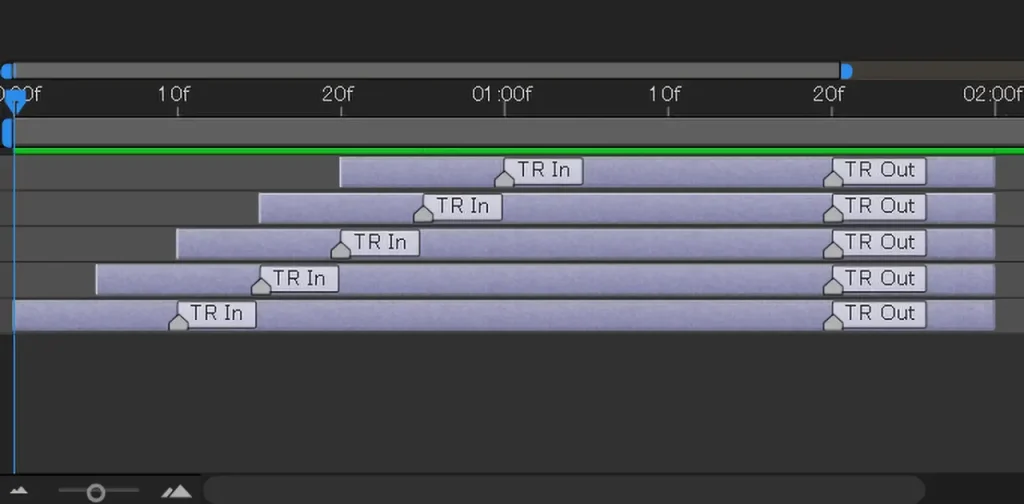
Layers
レイヤーのデュレーションはそのままで配置されます。
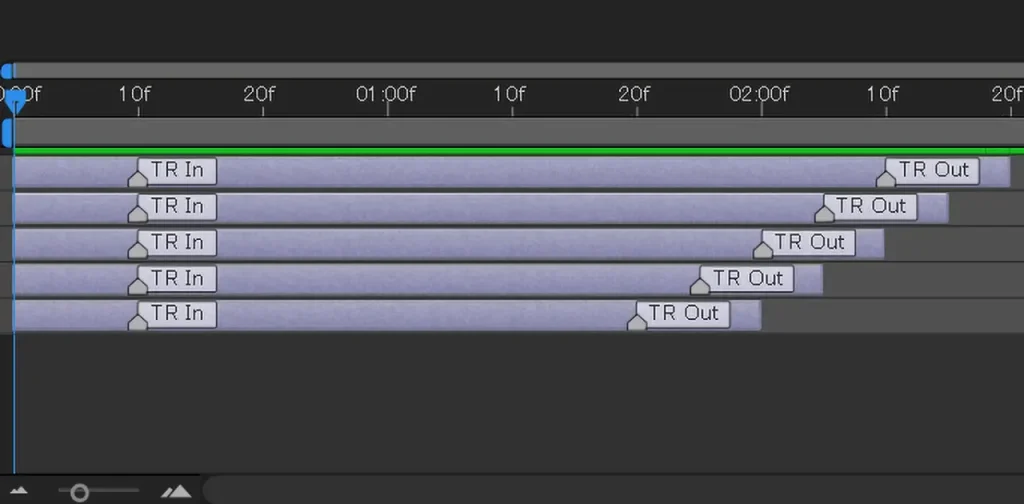
In transitions
In transitionsのみを変更して配置します。
レイヤーのデュレーションは変化します。
Out transitions
Out transitionsのみ変更して配置します
レイヤーのデュレーションは変化します。
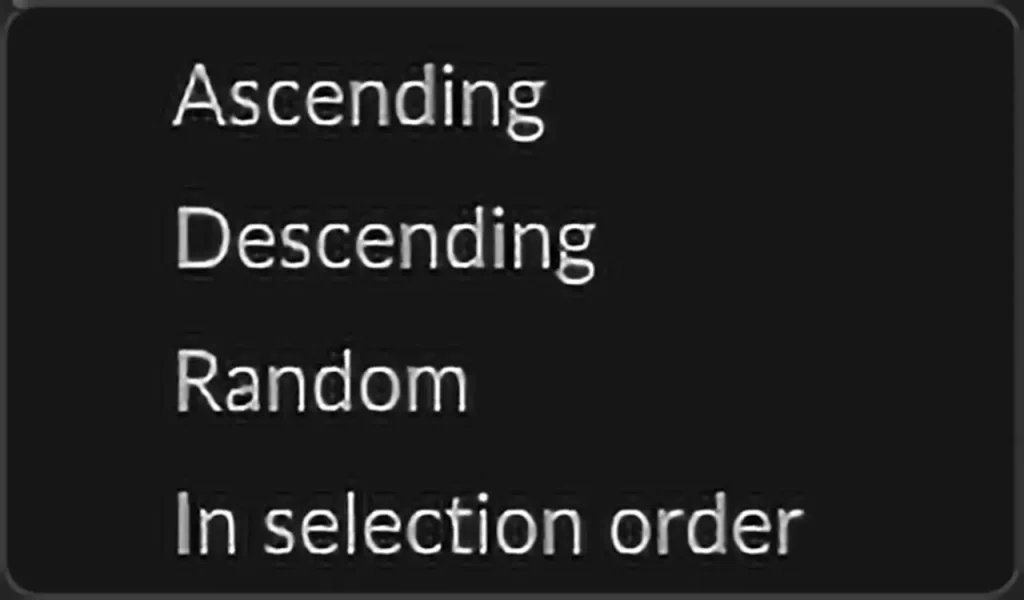
配置方法は『Ascending』、『Descending』、『Random』、『In selection order』の4つになります。
| Stagger欄・配置方法 | 詳細 |
|---|---|
| Ascending | 一番下から指定したフレーム分ずつ間隔をあけて配置(昇順) |
| Descending | 一番上から指定したフレーム分ずつ間隔をあけて配置(降順) |
| Random | 指定したフレーム分ずつランダムに配置 |
| In selection order | 指定したレイヤーの順番で指定したフレーム分ずつ間隔をあけて配置 |
以下から画像で確認できます
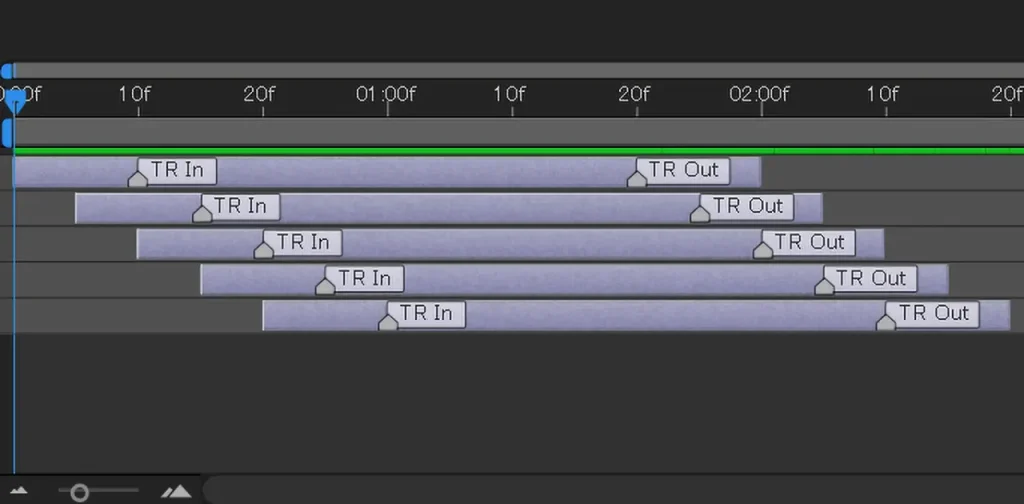
Ascending
一番下から(昇順)配置されます。
Descending
一番上から(降順)配置されます。
Random
指定したフレームの数値以内でランダム配置されます。
例)5フレームと入力した場合、0~5フレーム内でランダムに配置されます
In selection order
指定したレイヤーの順番で配置されます。
適用するレイヤーを選択して、配置方法を組み合わせることで使うことが来ます。
移動させたいレイヤーを複数選択します。
※1つ以上レイヤーを選択してください
移動させたいフレーム数を入力して、配置方法を選択します。
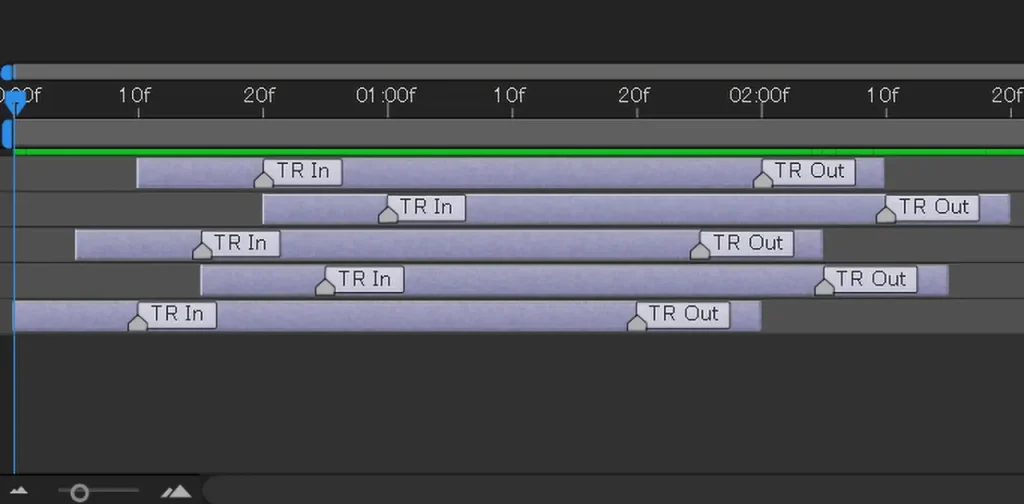
DOボタンを押すことで、レイヤーが指定したフレームずつ間隔をあけて昇順で均等配置されます。
番外編 : More
あまり使うことのない機能ですが解説します。
『Manager Products』と『Discover Packs』の2つの機能があります。
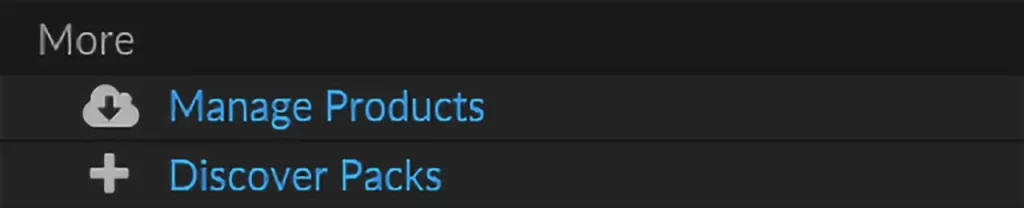
Manager Productsは、Mister Horse Product Managerを開く機能です
Discover Packsは、公式ホームページのパックを扱うページにアクセスできる機能です。
以上で、解説を終了します。
まとめ
Animation Composer 3で使える3つの便利ツールについて解説しました。
最後に、今回のおさらいです。
- Anchor Point Mover
- Keyframe Wingman
- Transition Shifter
3つの便利ツールはどれも必須級のツールです。
有料で同じようなツールやプラグインはたくさんありますが、無料でここまで使えるものはなかなかありません。
有料で高機能なツールはいらない方は、こちらのツールを試すことをおすすめします。
コメント