
【After Effects】無料プラグイン『FX Console』を使ってみよう- Video Copilot
どうも、YUです。
VIDEO COPILOTから出ている、無料プラグイン『FX Console』の解説です。
- エフェクトがどこにあるかわからない
- メニューバーやパネルからエフェクトを探すのがめんどくさい
- よく使うエフェクトをすぐに適用したい
- 英語のエフェクト名だと分かりにくい
こんな悩みを持った方はいないでしょうか。
そんな時に『FX Console』が解決してくれます。
After Effectsを使っている方ほぼ必須のプラグインだといっても過言ではないです。
無料で利用できるので、ぜひ一度使ってみてください。

最後に、After Effectsが日本語版でも、英語表記エフェクトを使えるようにする設定ファイルを配布しますので、ぜひ見ていってください。
この記事はWindowsOSで解説していますので、MacOSの方は参考程度に見ていただければと思います。
FX Console
FX Consoleとは、ショートカットからエフェクトやプリセットを適用することができるVideo Copilotの無償プラグインです。
主には、エフェクトの検索ツールとして使われます。
メニューバーかエフェクト&プリセットパネルからエフェクトを探すと、すこし手間がかります。
FX Consoleを使うことで、検索ウィンドウ(コンソール)からすぐにエフェクトを適用することができます。
一度使ってしまうともう戻れなくなるほど、おすすめできるプラグインです。
その他には、エフェクトのショートカット登録やプレビューのスクリーンショットなどの機能もあります。
FX Consoleのダウンロード・インストール
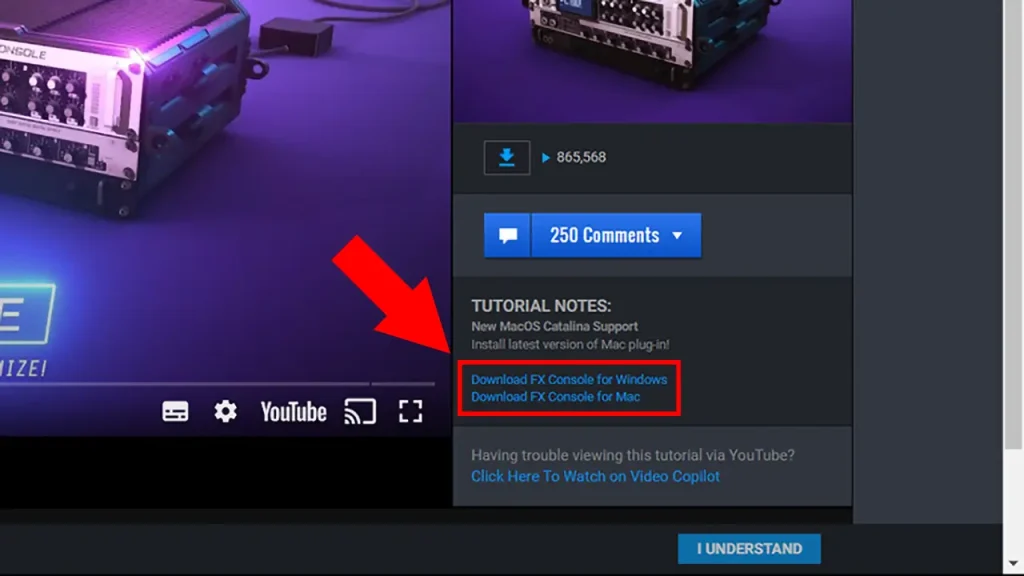
FX Consoleは、VIDEO COPILOTの公式サイトから無料でダウンロードすることができます。
公式サイトのFX Consoleの右下にダウンロードボタンがあるので、ご利用中のOSに合わせて選択してください。
※WindowsOSとMacOSが利用可能
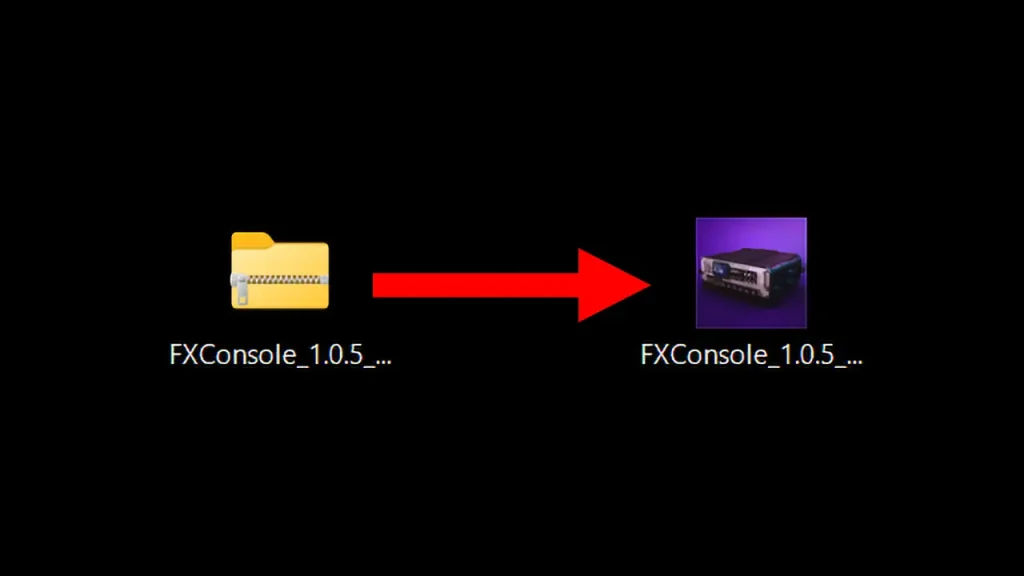
zipファイルのダウンロードがされるので、解凍してインストーラーを起動させます。
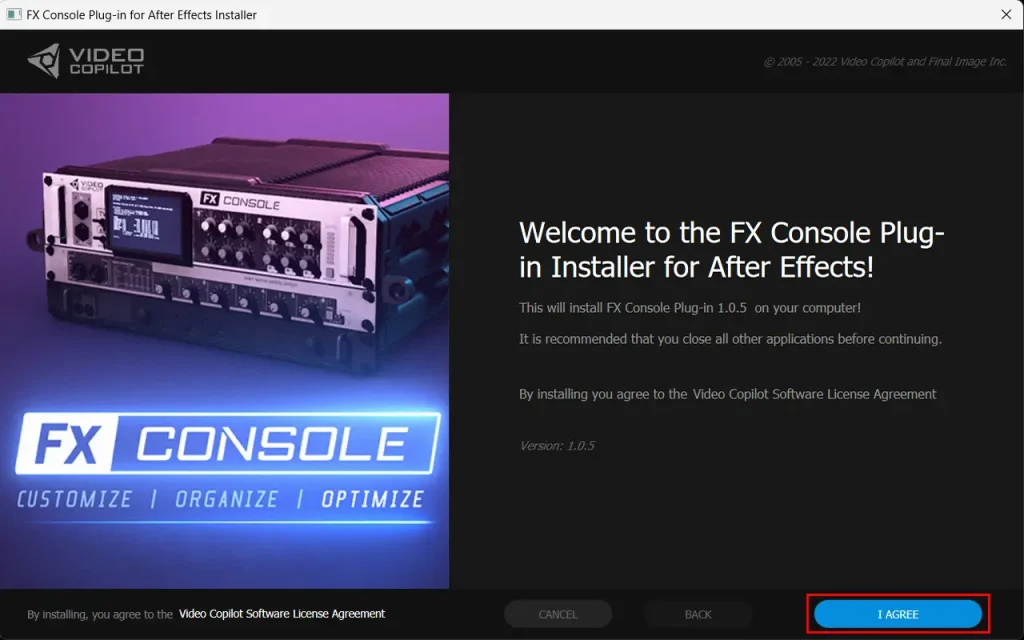
インストーラーが起動したら、I AGREEボタンをクリックして、次に進みます。
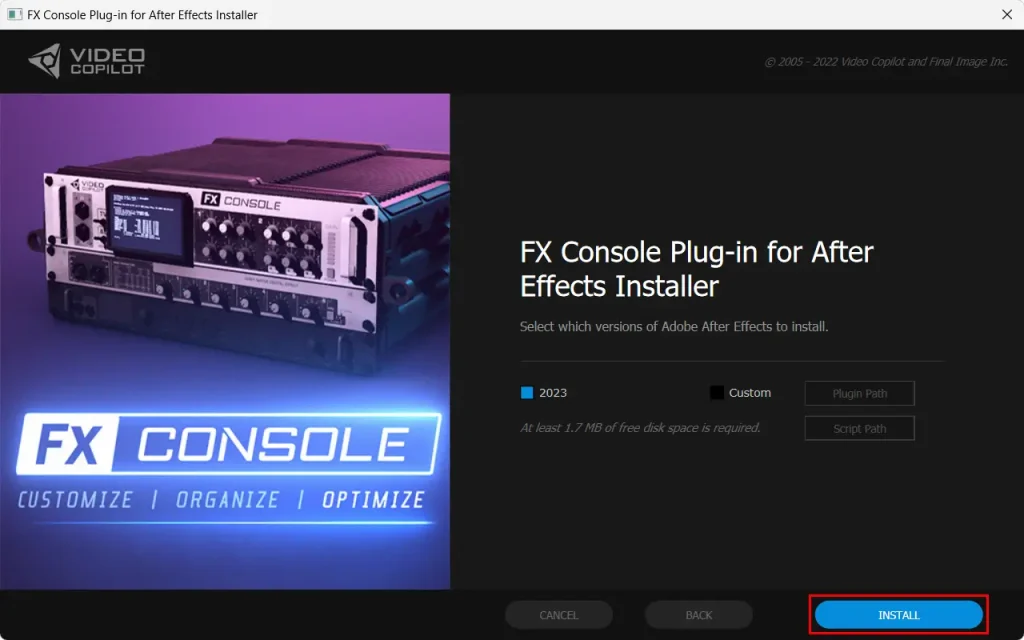
インストールしたいAfter Effectsのバージョンを選択して、右下のINSTALLボタンをクリックします。
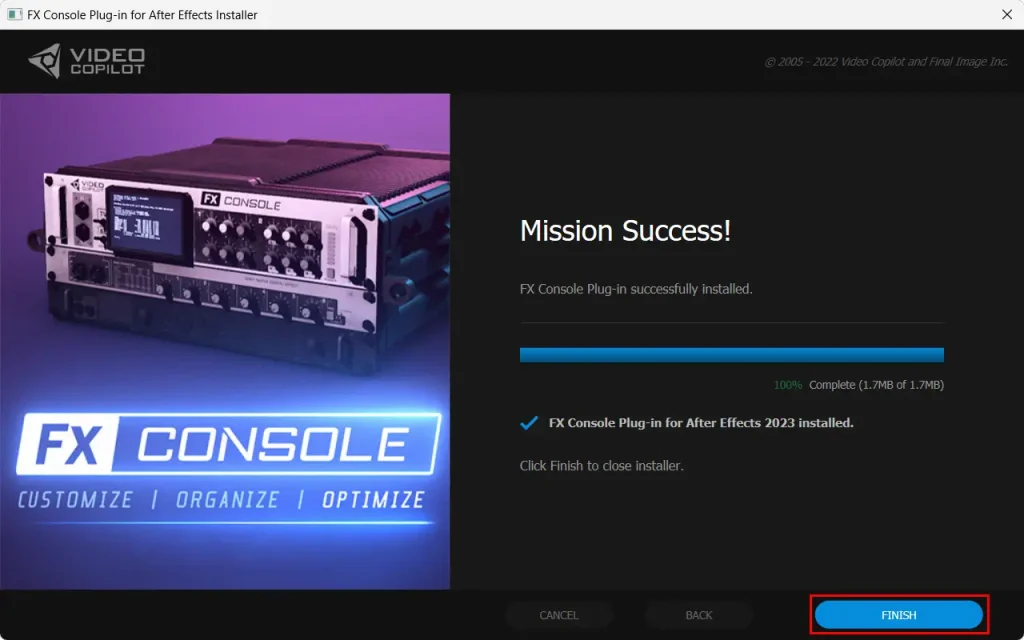
インストールが完了したら、右下にあるFINISHボタンを押してください。
これで無事インストールは完了です。
FX Consoleの使い方
使い方は簡単で、エフェクトを適用したいレイヤーを選択して、ショートカットキー使いパネルを表示させます。
【Windows】CTRLキー+SPACEキー
【MAC】⌘(Command)キー+SPACEキー
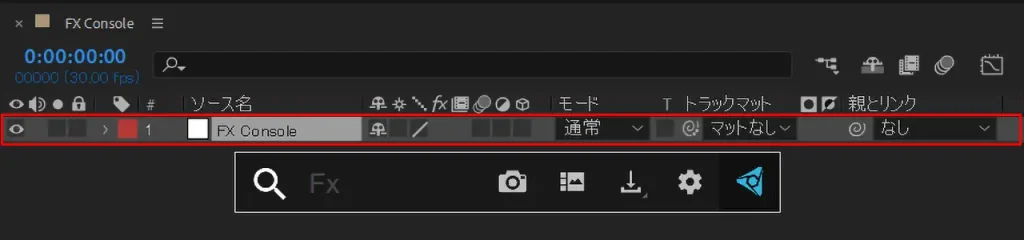
検索ボックスにエフェクト名を入力し、クリックかエンターで適用させます。
FX Consoleのアイコン
FX Consoleには、6つのアイコンがあります。

正直、エフェクトの検索と適用以外はほとんど使いません。
あまり使わないものもありますが、一つずつ見ていきましょう。
 エフェクトの検索と適用機能
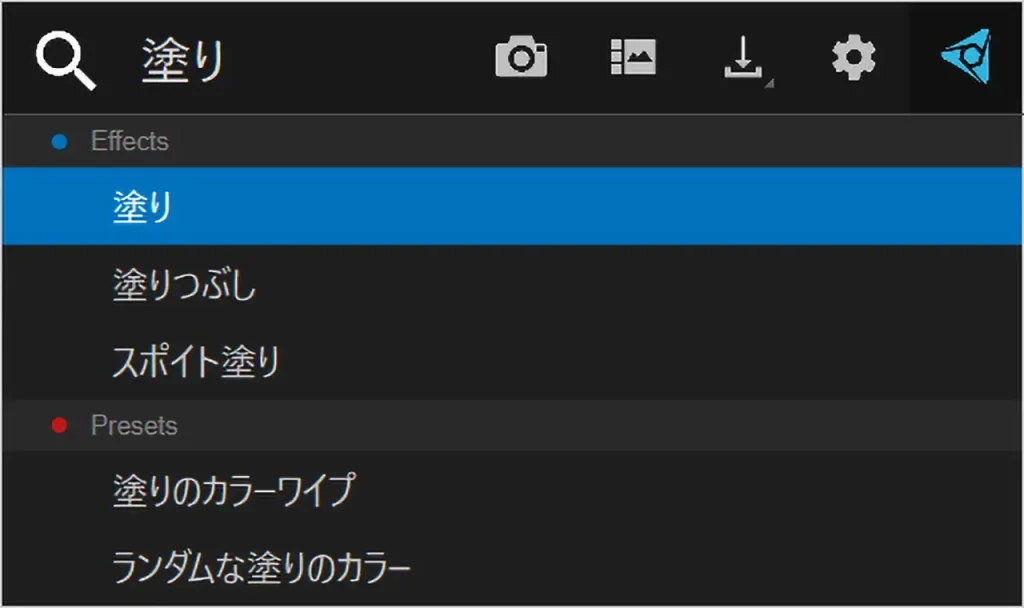
エフェクトの検索ができるFX Consoleの主要機能です。
標準エフェクトや外部エフェクト、プリセットを検索できます。
スクリーンショット機能
コンポジションパネルに表示されているプレビューをスクリーンショットできます。
ほとんど使うことはないです。
ギャラリー機能
撮ったスクリーンショットをギャラリーに表示させます。
ほとんど使うことはないです。
画像ダウンロード機能
撮ったスクリーンショットをjpegかpngでダウンロードできます。
ほとんど使うことはないです。
FX Console設定機能
FX Consoleの詳細設定ができます。
設定はすべてここから行います。
公式サイトリンク
VIDEO COPILOTの公式サイトのリンクになります。
FX Consoleの詳細設定
歯車マークをクリックすると、詳細設定ウィンドウが表示されます。
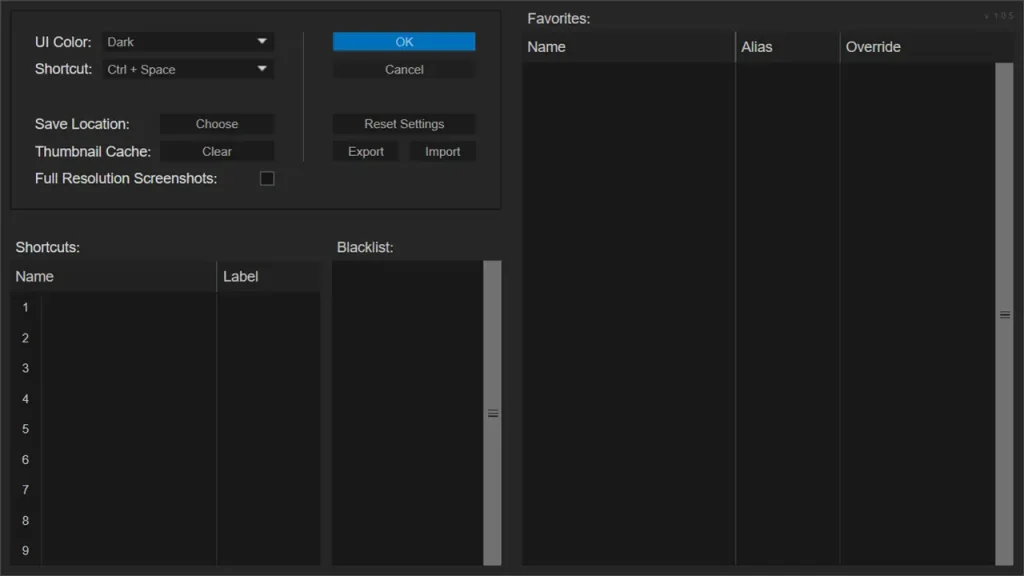
順番に解説していきます。
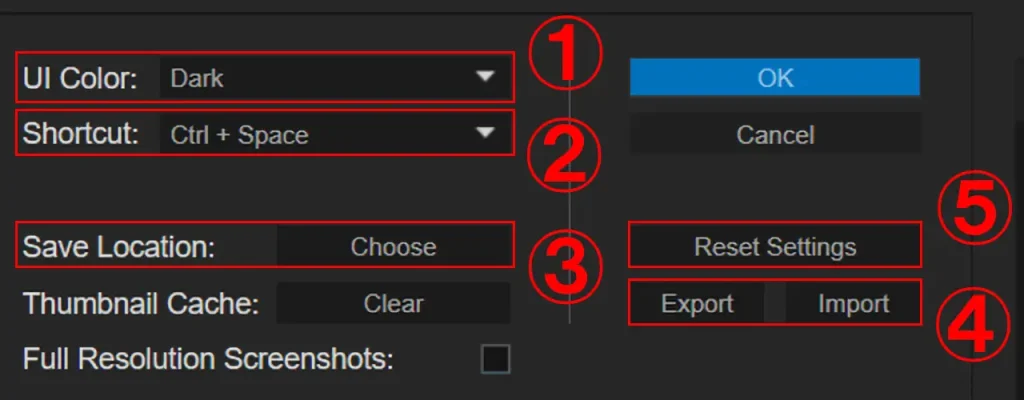
①UI Color
FX Console全体のUIの色を変更します。DarkとLightの2つあります。
好みのほうを選択しましょう。

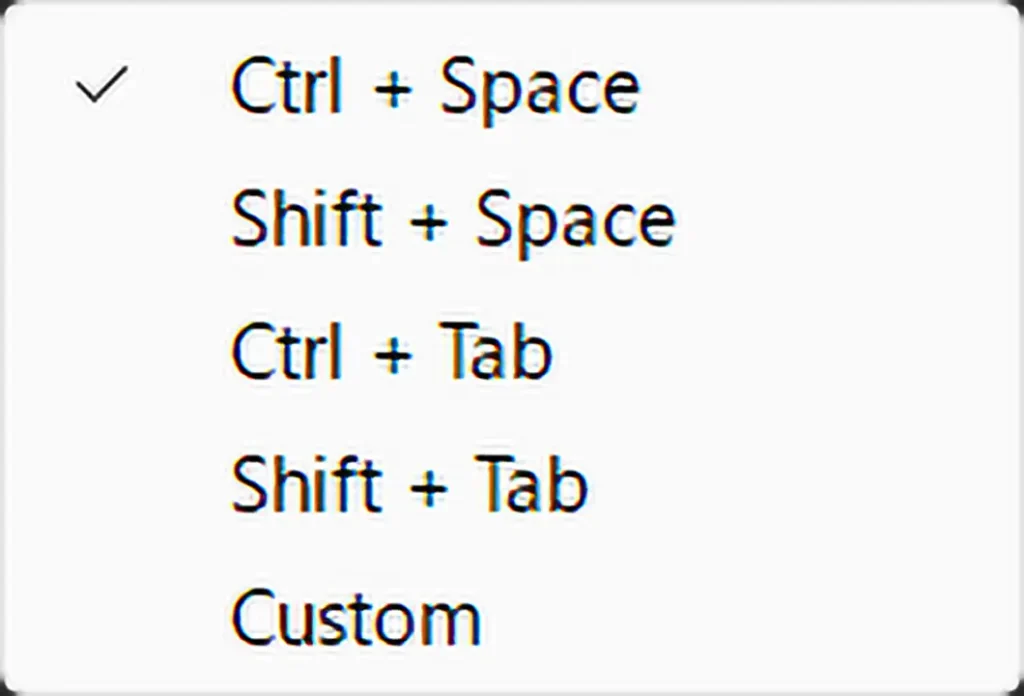
②Shotcut
初期設定ではCTRL+SPACキ(⌘Command+SPACE)ですが、5つ選択できます。
基本的には初期設定で大丈夫です。
③Save Location
スクリーンショットした画像や設定ファイルを保存する場所です。
初期設定では、C:\Users\ユーザー名\Documents\VideoCopilot\FXConsole\Captureに設定されていると思います。
※WindowsOSの場合
変更する場合は、エクスプローラーが表示され、自分の指定したフォルダに変更することができます。
④Export&Import
FX Consoleの設定をファイルに出力(Export)したり、読み込む(Import)ことができます。
PCを買い替えた場合や再インストールした場合に使用します。
⑤Reset Settings
すべての設定を初期化するボタンです。
設定を元に戻したい場合に使います。
FX Consoleのよく使う機能
FX Consoleでよく使う機能を2つ解説します。
エフェクトのショートカット登録機能
FX Consoleパネルにある歯車マークを選択し、設定ウィンドウを開きます。
Shortcuts:にあるName欄のNew+をクリックするとSet Shortcutウィンドウが開くので、登録したいエフェクトを検索バーに入力して選択します。
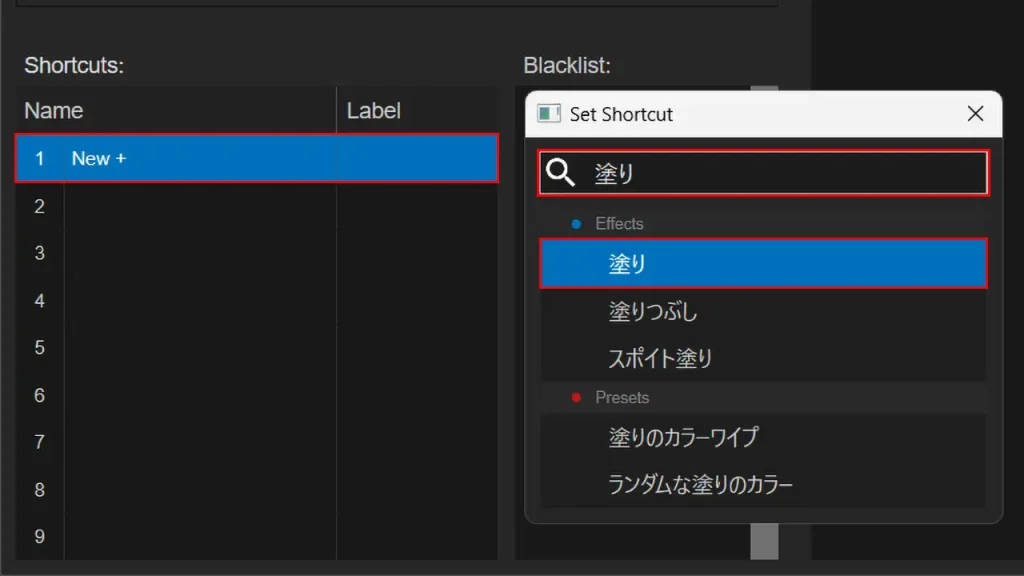
NameとLabel欄に表示されていれば完了です。
Labelは自動的に入力されますが、Label欄にあるテキストをクリックすることで変更できます。
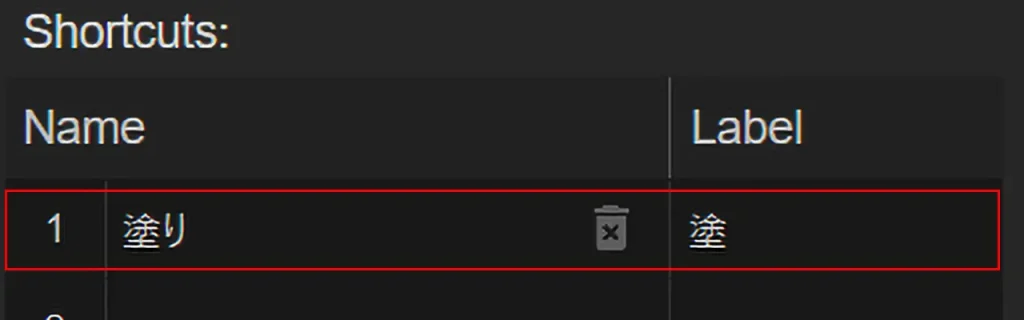
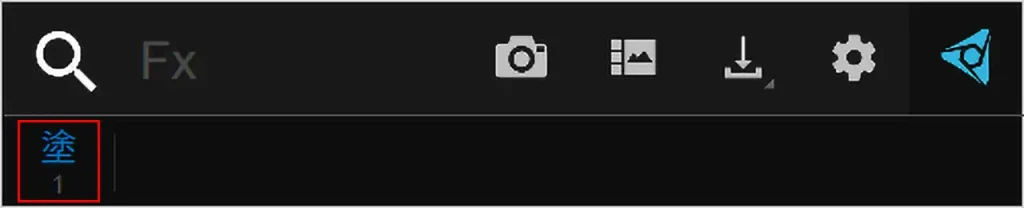
FX Consoleパネルの下段に設定したエフェクトが表示されます。
お気に入りのエフェクトに独自のキーワードを設定して検索する機能
FX Consoleパネルにある歯車マークを選択し、設定ウィンドウを開きます。
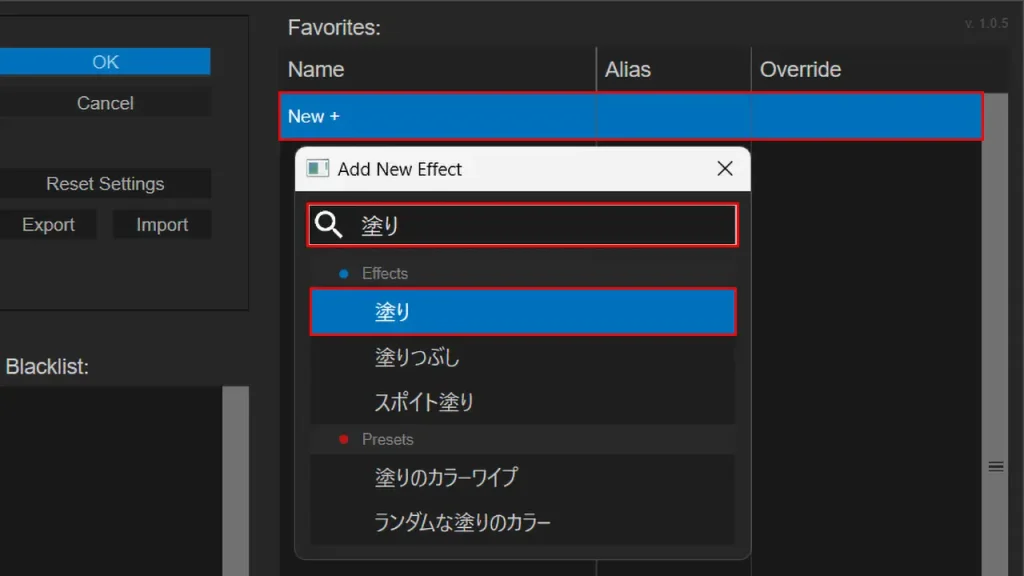
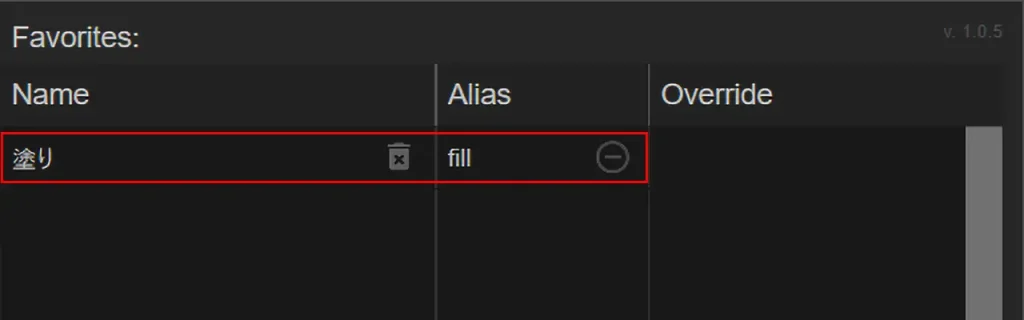
Favorites:にあるName欄のNew+をクリックするとAdd New Effectsウィンドウが開くので、登録したいエフェクトを検索バーに入力して選択します。
Favorites:にあるAlias(別名)欄のNew+をクリックするとAdd Aliasウィンドウが開くので、独自のキーワードを入力します。
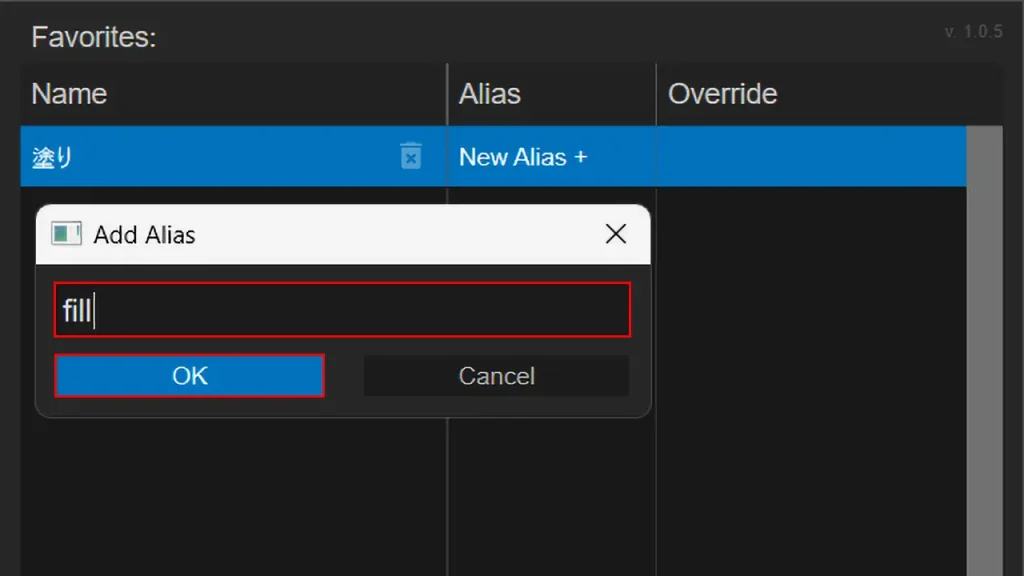
NameとAlias欄に表示されていれば完了です。
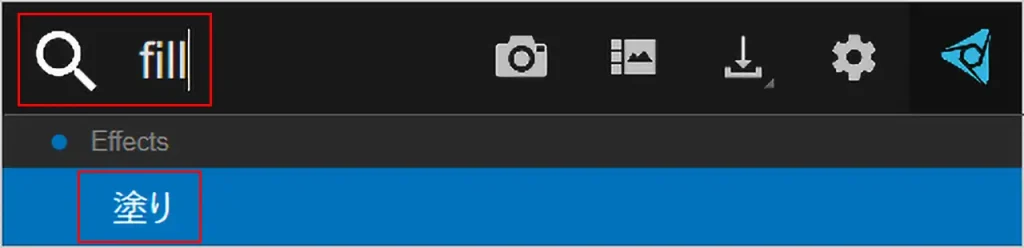
FX Consoleパネルの検索バーにAliasで設定した独自のキーワードを入力すると、お気に入りのエフェクトが表示されます。
FX Consoleの日本語検索について
海外のチュートリアル動画で英語表記のエフェクト名が出てくると思いますが、After Effectsを日本語に設定している場合は、英語表記のエフェクト名を入力しても日本語表記のエフェクトが検索できません。
お気に入りのエフェクトを独自のキーワードを設定して検索する機能を利用して、問題を解決します。
しかし、一つ一つ入力するとかなり時間がかかってしまうので、私は使っている設定ファイルを配布します。
FX Console設定ファイルをインポート
下記のボタンから、ファイルをダウンロードします。
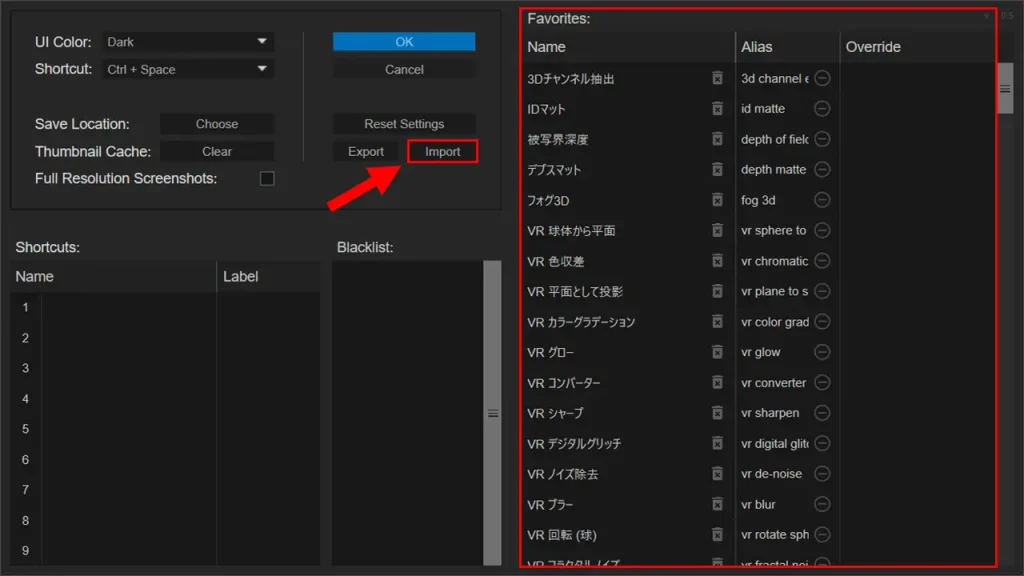
FX Consoleパネルから歯車アイコンをクリックし、設定ウィンドウを開きます。
Importボタンをクリックして、ダウンロードしたファイルを読み込ませます。
Favorites欄に日本語と英語のエフェクトが表示されたら完了です。
After Effectsのバージョン23.6で日本語表記になっているエフェクトを設定しています。
筆者の環境がWindowsのため、WindowsOSでは動作しますが、MacOSをご利用の方はファイルを読み込めない可能性がありますので、使用する場合は自己責任でお願い致します。
独自でFX Consoleを設定した場合、ファイルを適用するとすべて変更されてしまいます。
Save Location(保存先)が変更されてしまうので、保存先を自分で設定している場合は再度変更してください。
【システムドライブ\Users\ユーザー名\Documents\VideoCopilot\FXConsole\Capture】に変更されます。
※Windowsご利用の方は、初期設定でファイルを作成していますので、基本的にはそのままでOKです
以上で、FX Consoleの解説は終了です。
まとめ
FX Consoleについて解説しました。
最後に、今回のおさらいです。
FX Consoleは、VIDEO COPILOTが提供している無料プラグインになります。
主な機能として、エフェクトの検索機能とショートカット機能があります。
After Effectsを利用している人は、必須級のプラグインなので上級者の方だけでなく初心者の方にもおすすめです。
早めに導入して、操作に慣れておきましょう。
コメント